As an alternative to interior waterproofing by installing an interior weeping tile system, water leaking from the walls of a concrete block foundation can be repaired by excavating and waterproofing the exterior foundation walls. In this post we cover the advantages and disadvantages and the detailed steps involved in waterproofing foundations from outside.
In this article:
When exterior excavation and waterproofing is the best method
Advantages of exterior excavation and waterproofing
Disadvantages of exterior excavation and waterproofing
The steps involved in exterior foundation waterproofing
Risks associated with foundation excavation
Factors influencing the cost of excavating and waterproofing your basement
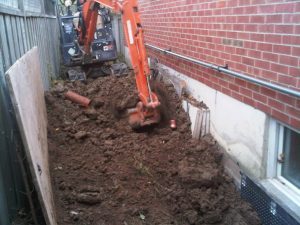
Machine excavation of foundation wall
While exterior excavation and waterproofing is usually more expensive than an interior weeping tile system, there are times when exterior foundation excavation and waterproofing is the best solution for the repair of a leaking concrete block foundation.
Not interested in digging around your home? Follow this link to check out our interior weeping tile system.
When Exterior Excavation and Waterproofing is The Best Repair Method
In general, exterior waterproofing is chosen when installing an interior weeping tile system for a concrete block / cinder block wall is not the best waterproofing option for a leaking basement. Homeowners typically choose the exterior excavation and waterproofing approach to repairing their leaking concrete block foundation walls when opening or accessing finished basement walls is undesirable; this is often the case when leaks originate behind expensive finished wet bars, teak panelling, fireplaces, built-in wall units, hot water tanks and furnaces installed close to the foundation walls, etc,.
The exterior condition of the concrete block walls may also justify external waterproofing; this is because the application of waterproof coatings will prevent further deterioration of the concrete blocks; this helps to preserve the integrity of the foundation, ultimately extending it’s life.
The application of elastomeric rubber coatings onto exterior foundation walls, a standard process employed by professional waterproofers, prevents foundation walls from coming into contact with ground water. As a result, the concrete blocks cannot absorb water; this is significant when dealing with concrete blocks above the frost line. Concrete blocks that are saturated with water and subsequently exposed to freezing temperatures will deteriorate rapidly as the blocks tend to spall.
Note: Epoxy injection and polyurethane injection cannot be used to waterproof concrete block foundation walls because it is not possible to control the containment of the injected resins, because concrete block foundations are largely hollow.
Advantages of Exterior Excavation and Waterproofing
1. Installing an interior weeping tile system is a very effective means of keeping your basement dry; however, water continues to infiltrate the concrete blocks due to their exposure to constant hydrostatic pressure. While interior perimeter drainage will drain the water to the sump pit/liner, the exterior walls are not protected as discussed above;
2. External excavation and waterproofing involves the replacement of the weeping tile along the excavated area and provides you with an opportunity to remove sediment and roots which may be clogging the weeping tile along the unexcavated sections of the foundation. A weeping tile flush is required to clear existing weeping tile;
3. External excavation provides an opportunity to straighten and reinforce a bowed concrete block foundation wall; and
4. When performing external excavation and waterproofing the installation of a cleanout is generally included (this allows easy access to the weeping tile from above grade in order to clean out clogged weeping tile).
It is clear that there are many advantages associated with external excavation and waterproofing of a concrete block foundation; however, there are also some disadvantages.
Disadvantages of Exterior Excavation and Waterproofing
1. External excavation may require the removal and re-installation of a deck, patio, air conditioning unit, driveway, cabana, flower bed, or concrete walkway;
2. Excavated soil tends to settle over time (usually a few years). This makes driveway, patio, and walkway re-installation problematic as they will likely slant towards the home as the soil settles (in spite of compaction – perfect compaction of clay soil is impossible to achieve);
3. Trees, shrubs and bushes that have been growing for many years are usually damaged or destroyed;
4. Re-landscaping upon completion of the external excavation and waterproofing work is always necessary;
5. Air conditioning units, pool filters, and hot tubs along the excavated area need to be disconnected, removed, and re-installed;
6. The installation of carbon fiber reinforcing straps, to arrest horizontal cracking in the mortar joints of the block foundation wall and reinforce the wall against further movement, cannot be installed on the exterior side of the foundation walls;
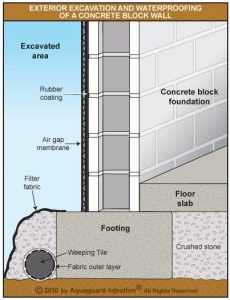
The illustration below shows the features of a professionally waterproofed concrete block foundation wall.
The Steps Involved in Exterior Foundation Waterproofing
External excavation and foundation waterproofing is a relatively simple process; the steps (if done by truly professional waterproofing contractors) are as follows:
1. A determination, in consultation with the homeowner, is made with respect to the amount of external waterproofing that needs to be done;
2. The accessibility of the excavation area is reviewed;
3. The location for the placement of excavated soil is established;
4. A call is made to Ontario One Call for the locates (the location of underground gas line, hydro lines, telephone and cable); Note: This is a non-negotiable legal requirement which takes at least a week. Any contractor willing to dig immediately is doing so illegally.
5. Adequate clearance for excavator access is required (usually 42″ wide); therefore, it may be necessary to remove a fence post or other obstructions;
6. Shrubs, bushes, trees and patio stones along the excavation area are removed and stacked out of the way;
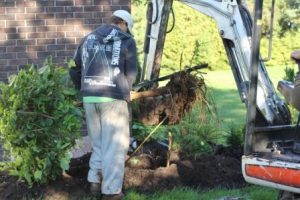
7. The area to be waterproofed is excavated;
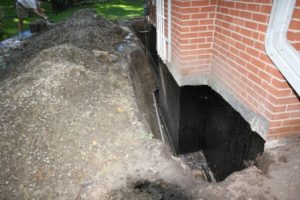
8. The wall to be waterproofed is cleaned with a wire brush (to ensure proper adhesion of the waterproof coating subsequently applied to the wall);
9. Cracked mortar joints are tuck pointed;
10. The entire exposed foundation wall may be covered with a parge coat (this will be dictated by the condition of the concrete blocks and involves additional cost);
11. An elastomeric rubber coating is applied to the wall (this type of coating is much more elastic than an application of tar); this coating is a cold applied elastomeric waterproofing membrane system. Typical applications for these membranes include underground tunnels, foundations, plaza decks, planters and underground parking structures as required to prevent the penetration of water under hydrostatic pressure;
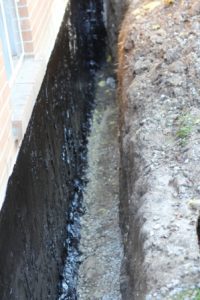
Foundation wall coated with elastomeric rubber membrane
12. The existing weeping tile, within the excavated area, is removed and a new weeping tile is installed and connected to the existing system around the unexcavated walls;
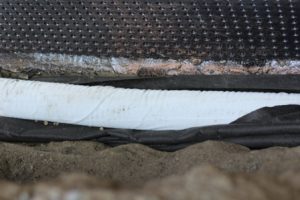
Weeping tile on filter fabric
13. The entire weeping tile system is tested for proper operation;
14. A gravel layer is installed on top of the newly installed weeping tile;
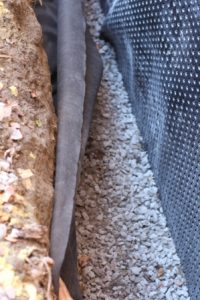
Weeping tile covered with gravel and filter fabric
15. An air-gap membrane (or drainage membrane) is installed over the waterproof coating; and
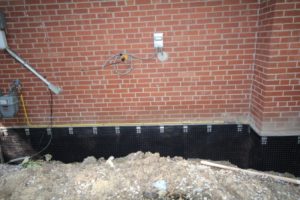
Foundation wrap installed over rubber waterproof coating
16. The excavated area is backfilled.
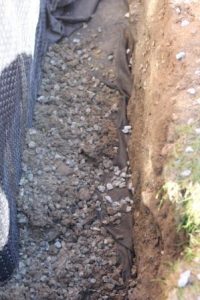
Backfill placed on top of filter protected weeping tile
Risks Associated With Foundation Excavation
It is important to note that there are significant inherent risks associated with external excavation and waterproofing. If you plan to undertake this type of waterproofing yourself or if you hire a company or person who is not a professional waterproofing contractor, we recommend that you acknowledge the following risks:
1. If improper excavation practices are used, there is the risk that a worker may be injured or killed by a soil cave-in; (the deeper the dig, the greater the risk). By law in Ontario, a person must not work in a hole deeper than 4 feet.
2. By law it is mandatory to obtain locates, which typically takes at least 2 weeks to obtain. The failure to obtain locates could result in significant damage to gas and hydro lines which could result in an explosion, the loss of electricity to your home, and fatal injury;
3. The installation of the weeping tile must be done properly; if not, proper drainage will be impeded; and
4. The failure to protect the ground where the excavator travels, and where the excavated soil is piled, will result in higher landscape restoration costs upon completion of the waterproofing work.
Some of the factors influencing the cost of excavating and waterproofing your basement:
- The presence of underground utilities in the area to be excavated makes it necessary to dig by hand;
- Digging by hand is more expensive than digging with an excavator;
- Hand digging under a deck is a very expensive proposition;
- The length, depth, and accessibility of the area being excavated are the primary determinants of the cost;
- The need for a corridor dig (where soil must be transported by wheelbarrow or a skid steer (Bobcat) to the front or back of the home because there is no room to pile the soil next to the excavated area) entrains additional cost;
- The need to cut and/or remove and dispose of poured concrete or asphalt covering the area to be excavated adds cost;
- Air conditioning units installed in the area being excavated usually need to be removed, the refrigerant needs to be captured, and the unit needs to be re-installed using a bracket fastened to the wall; and
- The cost of landscaping once the waterproofing work has been completed.
Note: Prior to the start of work, it is crucial that you confirm that the locations of the underground utilities are known (this is the waterproofing contractor’s responsibility), that the waterproofing contractor has at least $2,000,000.00 of commercial liability insurance, and that the workers have Workplace Safety and Insurance Board (WSIB) coverage.

